In this post, we're going to install SQL Server 2008 (64 bit). Make sure you’re connected to the Internet. Pop in the SQL Server 2008 with SP1 DVD. If you only have the ISO file, you can install the DAEMON Tools Lite d(http://www.daemon-tools.cc/eng/downloads) to emulate DVD.

It's informing you that it needs to download and install the .NET Framework. Click OK. This will take you to the following screen:

Accept the license agreement and click Install. This will download and install the .NET Framework:

Click Exit. This will take you to the following screen:

Click the Installation link on the left panel:

Click the "New SQL Server stand-alone installation or add features to an existing installation" link:

The Setup Support Rules runs to identify problems that might occur when you install the SQL Server Setup support files. There shouldn't be any failures, warning, or skipped items. Click OK. This will take you to the following screen:

Enter the product key and click Next:

Accept the license terms and click Next:

Click Install to install the Setup Support files. These files are needed to install or update SQL Server 2008:

You got two warnings. If you click on the Warning link for the first warning you'll get:

As you can see, installing SQL Server 2008 on a domain controller is not recommended. Recall that the AD DS Installation Wizard made the current server a domain controller. This is OK in our scenario so you can safely ignore this warning. However, in a production environment you should not install SQL Server on a domain controller.
If you click on the Warning link for the second warning you'll get:
If you click on the Warning link for the second warning you'll get:
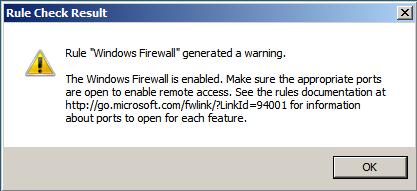
When you install Windows Server 2008, the Windows Firewall is enabled by default. This is warning you that other applications will not be able to remotely access this SQL Server instance until you open the appropriate ports. First you need to find out which ports those other applications need to use. Then you need to select Start > Administrator Tools > Windows Firewall with advanced security to launch:

Click Inbound Rules to add rules for those applications.
In our case we can safely ignore this warning as well. So click Next:
In our case we can safely ignore this warning as well. So click Next:

Select the items shown in the above figure and click Next to install them:

Select Default instance option. By default the SQL Server instance is named MSSQLSERVER as shown in the Instance ID text field in the above figure. You can use a different name if you wish as long as the name is unique, i.e. no other instance has the same name. You can also choose a root directory for this SQL Server instance. Whatever root directory you choose, the installation creates a folder named MSSQL10.SqlServerInstanceName under this root folder.
Use the default values for the Instance ID and Instance root directory and click Next:
Use the default values for the Instance ID and Instance root directory and click Next:

The above dialog specifies the disk space requirements for this SQL Server instance. Click Next:

You need to specify the configuration for this SQL Server instance. You need to specify an account for the SQL Server Agent and another account for SQL Server Database Engine. It is recommended that you use two separate accounts for these two services. To keep things simple, we will use MyServer\Administrator account for both of these services.
We're using the same MyServer\Administrator account everywhere in SQL Server and SharePoint 2010 to keep our discussions simple and focused. In real life, you should create different AD accounts with different permissions for different roles in SQL Server and SharePoint 2010.
Click “Use the same account for all SQL Server services” button:

Click Browse:

Enter myserver\administrator and click Check Names. Then click OK:

Enter the password for this account and click OK:

Use the specified default accounts for the SQL Full=text Filter Daemon Launcher and SQL Server Browser accounts and click Next:

Select Windows authentication mode for the Database Engine and click Add Current User button to add current users as the SQL Server administrator. I’m assuming you logged in as myserver\administrator.

Make your selections and click Next:

You should get no failures, no warning, but two skipped items. If you click View detailed report, you get:

As you can see the two skipped items are the two warnings that we decided to skip earlier. So we're OK. Click Next:

Click Install to start the installation:

Click Next:

Click Close. You're now done with the installation of SQL Server 2008. In the next post, we'll install the SQL Server 2008 SP1.


No comments:
Post a Comment