Saturday, November 28, 2009

SharePoint 2010 Beta Installation (Part 12): Running SharePoint Products and Technologies Configuration Wizard

This is the last post in a series of posts where I've been using screen shots to walk you through the steps to install SharePoint 2010 and all its prerequisites such as OS, SQL Server, service packs, cumulative update packages, etc.

In the previous post, we installed the SharePoint Server 2010 Bits. In this post, we'll run the SharePoint Products and Technologies Configuration Wizard to use these bits to install and configure SharePoint Server 2010 and to bring SharePoint into life.

Recall the following screen from the previous post (this was the last screen on the previous post):


The "Run the SharePoint Products and Technologies Configuration Wizard" option is checked on this screen. This means that when you close this screen, it'll automatically run the Wizard. Another option is to manually run the Wizard by selecting the Wizard from Start > All Programs > Microsoft SharePoint 2010 Products. Running the Wizard pops up the following screen:


This screen is asking you to prepare for what's coming up. You'll need to have the following pieces of information handy:
  • The name of the database server and database where server farm configuration data will be stored.
  • The user name and password for the configuration database access account that will administer the server farm
Recall from the previous post that we selected the Server Farm option to create a server farm. A server farm is a collection of servers that share the same configuration data, which is stored in the configuration database. As you can see, what makes a farm a farm is the configuration database. That is why the first order of business in creating a farm is to create a configuration data base where the server farm configuration data will be stored. This also means that administering a farm requires access to this configuration database. That is why the same account that is used for the configuration database access is also the server farm administrator account.

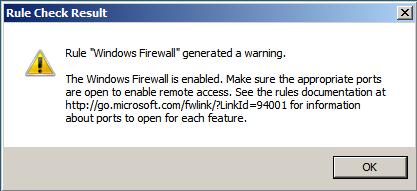
Click Next on the previous screen. This will pop up the following warning message:


This is warning you that IIS, SharePoint Timer Service, and SharePoint Administration Service may have to be started or reset if needed. Click Yes to view the next screen:


This screen asking whether you want to add this server to an existing farm or you want to create a brand new farm. Select the "Create a new server farm" option and click Next:


Because we're creating a brand new farm and because a server farm is nothing but a collection of servers that share configuration data, which is stored in the configuration database, the first order of business is to specify the name of the database server and the database where the configuration data will be stored. Note that if the database name you entered does not exits on the database server, the Wizard will automatically create the database. If the database already exits, it must be an empty database. Accept the default database name and enter the name of the database server.

You also need to specify the user name and password for the account that this server will use to access the configuration database. This will also become the server farm administrator account. In our case, you can enter MyServer\Administrator to keep things simple.

We've been using the same MyServer\Administrator account everywhere in SQL Server and SharePoint 2010 to keep our discussions simple and focused. In real life, you should create different AD accounts with different permissions for different roles in SQL Server and SharePoint 2010.

Click Next:


The passphrase is new in SharePoint 2010. You have to use the same passphrase for every server that joins the same farm. Enter a passphrase and click Next:


This screen gives you chance to specify a port for the SharePoint central administration Web application. If you do not specify a port, the Wizard will generate a random number and use that as the port. Keep in mind that the SharePoint central administration Web application must be hosted on the first server that joins a farm. You also need to specify an authentication provider for the SharePoint central administration Web application. Use NTLM. As you'll see later, every time a new Web application is created in SharePoint an authentication provider must be specified for the application. The SharePoint central administration Web application is no exception. Click Next:


This screens gives you one last chance to view the selections that you have made (i.e. the names of the database server and database for the configuration data, the port number for the central administration Web application, and the authentication provider for the central administration Web application) before the Wizard starts installing and configuring SharePoint. Click Next:


Wait until the Wizard completes the installation and displays the following screen:


This screen confirms that the configuration database with the specified name was created in the specified database server and the central Web application was created with the specified port and the authentication provider. Click Finish. This will take you to the central administration Web application where you're presented with the following screen:


Make your selection and click OK. This will take you to the following page in the SharePoint central administration Web application where you can configure the server farm:


The main goal of this page is to select and configure the services for this farm. Services are new concept in SharePoint 2010. I'll post more information about the SharePoint 2010 service application framework later. For now, it suffices to say the following. The Shared Services Provider concept no longer exits in SharePoint 2010. This introduces the following important features:
  • Services are now autonomous and can be configured individually
  • You can have multiple instances of the same service application
  • Services can be individually associated with Web applications. This is very different from SharePoint 2007 where all shared services in the Shared Services Provider were associated with all Web applications associated with that Shared Services Provider. It was all or nothing in SharePoint 2007. There was no way to associate individual services to individual Web applications.
  • SharePoint 2010 contains a whole lot more services than SharePoint 2007
The sheer number of services in SharePoint 2010 could complicate SharePoint installation because you would have to configure many individual service applications. To simplify installation, SharePoint 2010 comes with a configuration Wizard that automatically creates and configures all service applications by default. Off course, sooner or later you have to go in and configure them individually. Hit Next on the previous screen to launch the Configuration Wizard:


This screen asks you to either select an exiting managed account or create a new one that will be used for all service applications. The concept of managed account is new in SharePoint 2010. I'll discuss this concept in future posts. For now, it suffices to say that this feature simplifies the management of SharePoint accounts, which is big hassle in SharePoint 2007. Select the "Use existing managed account" option and select the MyServer\Administrator account to keep things simple. Keep all service applications checked, which is the default. Click Next to have the Wizard create and configure all service applications in one shot. As you can see, the Wizard saves you from having to configure each service application individually. As mentioned earlier, sooner or later you have to go in and configure these service applications individually.


Click skip to skip creating the site collection:


This will take you to the following page in the central administration Web application where you can see all service applications created, configured, and running.


Click Finish. This takes you back to the home page of the central administration Web application:


Congratulations! You're now done with the installation of SharePoint 2010 Beta. In next posts, we'll discuss new features and capabilities of SharePoint 2010.

SharePoint 2010 Beta Installation (Part 11): Installing SharePoint 2010 Beta

This is the eleventh post in a series of posts where I'm using screen shots to walk you through the steps to install SharePoint 2010 and all its prerequisites such as OS, SQL Server, service packs, cumulative update packages, etc.

In this post, we'll install SharePoint Server 2010 Beta. Double click the OfficeServer executable and run it. This will bring up the following screen:


Click on the “Install software prerequisites” to install the prerequisites. As you can see, there is still some more prerequisites that needs to be installed before SharePoint Server 2010 Beta can be installed. The good news is we don't have to worry about installing these prerequisites. The executable automatically downloads the right versions of these prerequisites and installs them:


This screens tells you what prerequisites the executable is going to download and install. Click Next:


Accept the license terms and click Next:


Wait until the installation completes and you get the following screen:


This screen confirms that all prerequisites were successfully downloaded and installed. Click Finish. Next go back to the main screen, i.e.


And click the Install SharePoint Server link to start the installation of SharePoint Server 2010 Beta. This will pop up the following screen:


Enter the product key and click Continue:


Accept the license terms and click Continue:


As this screen shows, you have two installation options:
  • Stand-alone: This option creates a single server stand alone with default settings.
  • Server Farm: This option creates a server farm of single or more servers
Click the Server Farm option to create a server farm. This will take you to the following screen:


This screen consists of two tabs. In the first tab you have to specify the type of server. The Complete option creates a server farm to which you can add more servers later. The Stand-alone option creates a server farm with a single server only where you cannot add any more servers later. This option also installs and makes use of the SQL Server 2008 Express Edition instead of the SQL Server instance that we installed in previous posts.

It should be clear by now that you should select the Complete option. The second tab allows you to specify the folder on the file system of the server to install the SharePoint 2010 bits.


Choose the default folder and click Install Now to install the SharePoint 2010 Beta bits on the specified folder on the file system of the server.


Wait until the installation completes and you get the following screen:


This screen tells you that the SharePoint 2010 bits were successfully installed on the file system of the server and you should run the SharePoint Products and Technologies Configuration Wizard to install SharePoint 2010 Beta. Note that at this the SharePoint 2010 Beta has not been installed yet. Only the bits required to install SharePoint 2010 Beta have been installed. It is the SharePoint Products and Technologies Configuration Wizard that install SharePoint and bring into life.

We'll run this configuration wizard in the next post.

SharePoint 2010 Beta Installation (Part 10): Installing SQL Server 2008 Cumulative Update Package 2 (CU2) 64 bit

This is the tenth post in a series of posts where I'm using screen shots to walk you through the steps to install SharePoint 2010 and all its prerequisites such as OS, SQL Server, service packs, cumulative update packages, etc.

In this post, we'll install the SQL Server 2008 Cumulative Update Package 2 (CU2), which can be downloaded from the following URL:

http://support.microsoft.com/kb/970315

Getting CU2 requires you to provide an email address to Microsoft. Make sure the settings on your browser is correct so you get 64 bit version of CU2. You’ll get an email from Microsoft that contains two links with two passwords. Click the second link first to download the first hotfix. After you download it, execute it. This will try to unzip the file and will pop up the following asking for the password that you got from Microsoft:


Enter the password and click OK. After unzipping is done, use the Windows Explorer and navigate to the folder where the hotfix is unzipped and click the hotfix to execute it:


You should get no failures, warning, or skipped items. Click Next:


Accept the license terms and click Next:


Make sure the MSSQLSERVER option is checked. This is the default SQL Server instance that we installed in a couple of posts ago. In other words, we're going to apply the hotfix to this instance to update it:


Click Next


This screen gives you the last chance to ensure that the right features are updated with this hotfix. Make sure this includes the default SQL Server instance and click Update to update the instance with the changes in this hotfix:


This screen confirms that the hotfix updated the default SQL Server instance. Click Next:


Click Close. You're now done with the installation of the first hotfix. Do the same thing with the first link in the email that you got from Microsoft and follow the same steps to install the other hotfix.

We're now done with the installation of the prerequisites for SharePoint 2010 Beta. In the next post, we'll install SharePoint 2010 Beta.


SharePoint 2010 Beta Installation (Part 9): Installing SQL Server 2008 SP1 (64 bit)

This is the ninth post in a series of posts where I'm using screen shots to walk you through the steps to install SharePoint 2010 and all its prerequisites such as OS, SQL Server, service packs, cumulative update packages, etc.

In the previous post, we installed SQL Server 2008 (64 bit). In this post we'll install SQL Server 2008 SP1, which can be downloaded from the following URL:

http://www.microsoft.com/downloads/details.aspx?familyid=66AB3DBB-BF3E-4F46-9559-CCC6A4F9DC19&displaylang=en

Click the above link. This will take you to the following page:


Click the Download button for 64 bit version to down and install SP1:


You should get no failures, warnings, or skipped items. Click Next:


Accept the license terms and click Next:


Make sure the MSSQLSERVER is selected. Recall that this is the name of the SQL Server instance that we installed in the previous post. In other words, we're applying SP1 to this SQL Server instance. Click Next:


Click Next:


This screen gives you one more last chance to confirm the list of features being updated by SP1. In our case this list includes the default SQL Server instance. Click Update to update the instance with SP1:


Click Next:


Click Close. You're now done with the installation of SQL Server 2008 SP1. In the next post, we'll install the SQL Server 2008 Cumulative Update Package 2 (CU2).

SharePoint 2010 Beta Installation (Part 8): Installing SQL Server 2008 (64 bit)

This is the eighth post in a series of posts where I'm using screen shots to walk you through the steps to install SharePoint 2010 and all its prerequisites such as OS, SQL Server, service packs, cumulative update packages, etc.

In this post, we're going to install SQL Server 2008 (64 bit). Make sure you’re connected to the Internet. Pop in the SQL Server 2008 with SP1 DVD. If you only have the ISO file, you can install the DAEMON Tools Lite d(http://www.daemon-tools.cc/eng/downloads) to emulate DVD. As soon as you pop in the DVD and start installing SQL Server, the following message pops up:


It's informing you that it needs to download and install the .NET Framework. Click OK. This will take you to the following screen:


Accept the license agreement and click Install. This will download and install the .NET Framework:


Click Exit. This will take you to the following screen:


Click the Installation link on the left panel:


Click the "New SQL Server stand-alone installation or add features to an existing installation" link:


The Setup Support Rules runs to identify problems that might occur when you install the SQL Server Setup support files. There shouldn't be any failures, warning, or skipped items. Click OK. This will take you to the following screen:


Enter the product key and click Next:


Accept the license terms and click Next:


Click Install to install the Setup Support files. These files are needed to install or update SQL Server 2008:


You got two warnings. If you click on the Warning link for the first warning you'll get:


As you can see, installing SQL Server 2008 on a domain controller is not recommended. Recall that the AD DS Installation Wizard made the current server a domain controller. This is OK in our scenario so you can safely ignore this warning. However, in a production environment you should not install SQL Server on a domain controller.

If you click on the Warning link for the second warning you'll get:


When you install Windows Server 2008, the Windows Firewall is enabled by default. This is warning you that other applications will not be able to remotely access this SQL Server instance until you open the appropriate ports. First you need to find out which ports those other applications need to use. Then you need to select Start > Administrator Tools > Windows Firewall with advanced security to launch:


Click Inbound Rules to add rules for those applications.

In our case we can safely ignore this warning as well. So click Next:


Select the items shown in the above figure and click Next to install them:


Select Default instance option. By default the SQL Server instance is named MSSQLSERVER as shown in the Instance ID text field in the above figure. You can use a different name if you wish as long as the name is unique, i.e. no other instance has the same name. You can also choose a root directory for this SQL Server instance. Whatever root directory you choose, the installation creates a folder named MSSQL10.SqlServerInstanceName under this root folder.

Use the default values for the Instance ID and Instance root directory and click Next:


The above dialog specifies the disk space requirements for this SQL Server instance. Click Next:


You need to specify the configuration for this SQL Server instance. You need to specify an account for the SQL Server Agent and another account for SQL Server Database Engine. It is recommended that you use two separate accounts for these two services. To keep things simple, we will use MyServer\Administrator account for both of these services.

We're using the same MyServer\Administrator account everywhere in SQL Server and SharePoint 2010 to keep our discussions simple and focused. In real life, you should create different AD accounts with different permissions for different roles in SQL Server and SharePoint 2010.

Click “Use the same account for all SQL Server services” button:


Click Browse:


Enter myserver\administrator and click Check Names. Then click OK:


Enter the password for this account and click OK:


Use the specified default accounts for the SQL Full=text Filter Daemon Launcher and SQL Server Browser accounts and click Next:


Select Windows authentication mode for the Database Engine and click Add Current User button to add current users as the SQL Server administrator. I’m assuming you logged in as myserver\administrator.


Make your selections and click Next:


You should get no failures, no warning, but two skipped items. If you click View detailed report, you get:


As you can see the two skipped items are the two warnings that we decided to skip earlier. So we're OK. Click Next:


Click Install to start the installation:


Click Next:


Click Close. You're now done with the installation of SQL Server 2008. In the next post, we'll install the SQL Server 2008 SP1.